|
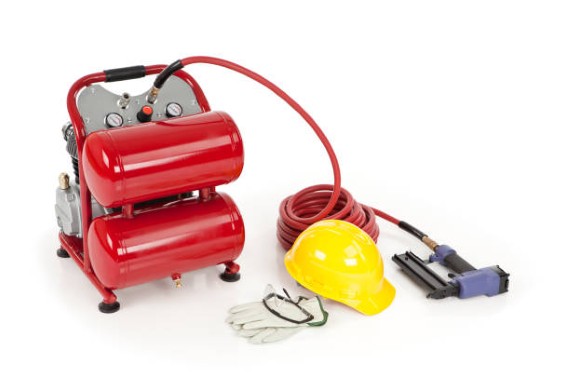
Air compressors are a great addition to any shop, but when they stop working it can be frustrating. One of the most common problems with air compressors is a bad start capacitor. This component serves the compressor start-up, and if it’s not working properly the compressor won’t run at all. Luckily, replacing a start capacitor is a relatively simple task that you can do yourself. With a few tools and some patience, you should be able to get your air compressor up and running in no time at all. How to Replace a Start Capacitor on an Air Compressor: The Significant StepsIf your air compressor won’t start, there’s a good chance that the start capacitor is the problem. During the normal use of the compressor, the startup capacitor may break down over time due to normal wear and tear or it may stop working if it becomes too hot. Before you begin, it’s important to gather the proper tools. You’ll need a screwdriver, a wire stripper, and a new start capacitor. You can purchase a replacement capacitor at most hardware online stores. Once you have the necessary tools, follow these steps to replace the start capacitor on your air compressor: 1. Disconnect the Power:As a first step, make sure that the air compressor is unplugged from the power source. Once the power is disconnected, you can begin working on the compressor. It is a wise idea to also wear safety glasses to protect your eyes. 2. Remove the Cover:The next step is to remove the cover from the air compressor. This will give you access to the start capacitor. In the event that the cover has been removed, locate the capacitor on the board and remove it from the wires. 3. Strip the Wires:Using a wire stripper, strip about ½ inch of insulation from the end of each wire. It’s important to be very careful when you’re doing this so you don’t damage the wires. Just a small nick in the wire can cause major problems. 4. Connect the Wires:Now it’s time to connect the new capacitor. Take a black wire from the capacitor and attach it to the black wire connected to the air compressor. Do the same with the white wires. As soon as you have connected both wires, you can screw on the cover and plug in the compressor. 5. Test the Compressor:To test the compressor, turn it on and see if it starts up properly. If it does, then you’ve successfully replaced the start capacitor. If not, then you may need to consult a professional for help. These are the basic steps you need to follow in order to replace the starter capacitor on an air compressor. Tips for Maintaining Your Air CompressorTo keep your air compressor in good working condition, there are a few things you can do.
By following these tips, you can maintain the performance of your air compressor and extend its lifespan. ConclusionNow that you have the knowledge to replace an air compressor start capacitor, instead of paying a mechanic to do it for you, it is possible to do it yourself and save some money. Just be sure to follow the steps carefully and have the right tools for the job. Just by following the steps in this article, it should be achievable to start using your air compressor in a few minutes. Thanks for reading.
0 Comments
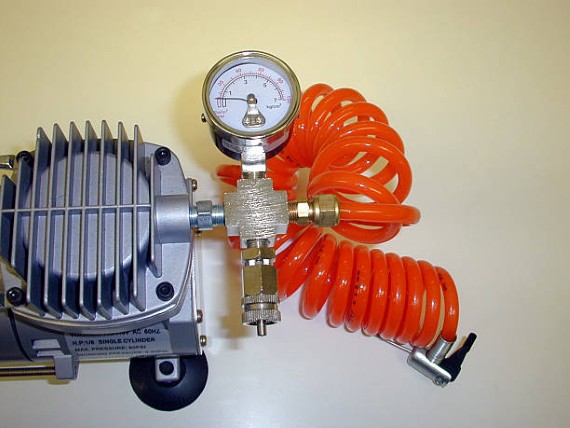
A vacuum pump removes gases from a sealed volume in order to create a vacuum. It can be difficult and expensive to buy a vacuum pump, but it's easy and affordable to make your own with an air compressor. In this post, we will guide you on how to make a vacuum pump with an air compressor. This is a great project for anyone who wants to learn more about vacuum pumps and how they work. Let's get started. What is a Vacuum Pump, and what does it do?A vacuum pump is a device that pulls air out of an enclosed space, creating a vacuum. Vacuum pumps are used in a variety of applications, including HVAC (heating, ventilation, and air conditioning), automotive, medical, laboratory, and manufacturing. Steps for Making a Vacuum Pump Using an Air CompressorMaking a vacuum pump with an air compressor is actually quite simple. All you need is an air compressor, some hose, and a few other items that can be easily found at your local hardware store. You will need the following items to make your own vacuum pump. Once you have obtained these items, you can follow the steps below. Step 1: Choose an Air CompressorThe first step is to choose an appropriate air compressor. Take a small air compressor that is capable of producing at least 90 PSI of pressure. If you cannot find an air compressor with these specifications, you can always purchase one online. It is important to note that the size of the air compressor will determine the size of the vacuum pump. Step 2: Connect the Air Compressor to the HoseTo continue, the air compressor must be connected to the hose. If your air compressor does not have a built-in regulator, you will need to purchase one separately. Once you have connected the air compressor to the hose, turn on the compressor and allow it to build up pressure. Step 3: Connect the Hose to the Vacuum PumpNow, take the other end of the hose and connect it to the vacuum pump. If everything is properly connected, the vacuum pump should begin to work. If you do not see any results, check all of the connections and make sure that there are no leaks. Step 4: Test the Vacuum PumpTo test the vacuum pump, simply put your hand over the end of the hose that is not connected to the air compressor. If the vacuum pump is working properly, you should feel suction on your hand. If you do not feel any suction, check all of the connections and make sure that there are no leaks. Final ThoughtCongratulations. You have now created your very own vacuum pump with an air compressor. This project is relatively simple and only requires a few materials. With your new pump, you can now perform a variety of tasks that require a vacuum. Be sure to use caution when handling the pump, as it can be dangerous if not used properly. Thanks for reading and good luck.
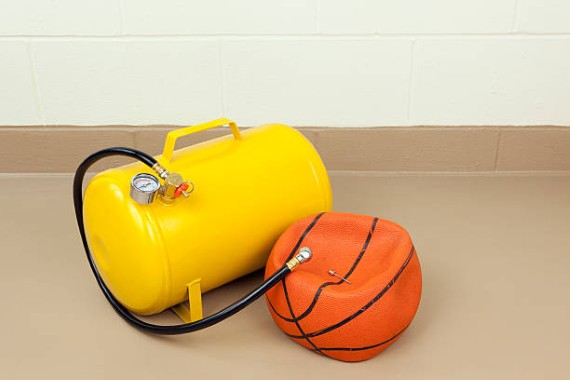
You're driving along and see a sign for a free air compressor to inflate your tires. You pull in, but you're not sure how to use it. It can be confusing trying to figure out how to use an air compressor, especially if you've never done it before. But don't worry, we're here to help. We will be explaining how to use an air compressor to inflate your tires in this article. Also, we'll give you a few tips on how to get the best results. We recognize how crucial tools are to you and your lifestyle, which is why we strive to bring you the most up-to-date and comprehensive information available. Thank you for visiting Tools Auditor Team! What is an Air Compressor, and What are Its Uses?An air compressor is a device that increases the pressure of air or gas by reducing its volume. Air compressors are used in a variety of applications, from power tools such as drills and impact wrenches to inflating tires and operating pneumatic equipment. There are many different types of air compressors, each with its own unique features and benefits. For example, portable air compressors are ideal for use on construction sites or in workshop environments, while stationary air compressors are more suited for industrial applications. Choosing the right air compressor depends on the specific needs of the application. When inflating tires, it is important to select an air compressor that can generate enough pressure to inflate the tire to the proper level. The Proper Way to Use an Air Compressor to Inflate TiresAn air compressor is a handy tool to have around, and one of the most common uses for an air compressor is inflating tires. Whether you're filling up your car's tires before a road trip or pumping up a basketball for your kids to play with, using an air compressor to inflate tires is quick and easy. Here's how to do it: 1. Turn Off your Engine and Park your CarPark your car on a level surface and turn off the engine. If you're inflating tires that are mounted on a vehicle that has an air compressor, make sure the engine is turned off before proceeding. 2. Attach the Air Compressor HoseFind the inflation port on your air compressor, which is typically located near the top of the unit. Once you've located it, screw on the air hose. If your air compressor has a quick-connect coupling, simply push it onto the inflation port until it clicks into place. 3. Install the Tire Inflation Port on the CompressorLocate the tire inflation port, which is located on the rim of the tire. The inflation port looks like a small metal or rubber cap with a hole in the center. Once you've located it, insert the compressor nozzle into the hole. If your air compressor has a quick-connect coupling, make sure that the valve is open before proceeding. 4. Turn on the Air Compressor and Inflate the TireTurn on the air compressor by flipping the switch to the "On" position. The compressor will start running and the needle on the pressure gauge will start to move. When the needle reaches the desired PSI, turn off the air compressor by flipping the switch to the "Off" position. 5. Remove the Compressor Nozzle and Air HoseRemove the compressor nozzle from the tire inflation port and unscrew the air hose from the inflation port on the air compressor. If your air compressor has a quick-connect coupling, simply push the release button to detach the hose. 6. Replace the Tire Inflation Port CapScrew on or snap back into place the tire inflation port cap. This will help to prevent dirt and debris from getting into the inflation port. By following these simple steps, you can easily use an air compressor to inflate tires. Be sure to check your tire pressure regularly and top off as needed to maintain optimal tire performance and extend the life of your tires. Final ThoughtsAssuming you have followed all of the steps in this guide, you should now know how to use an air compressor to inflate tires. Although it may seem like a daunting task at first, it is actually quite simple once you get the hang of it. Just remember to take your time and be careful when handling the air compressor and you should be fine. Thanks for reading. |